Tag Archives: DIY

DIY Baby Snuggler Swaddle Wrap

20141123_100657

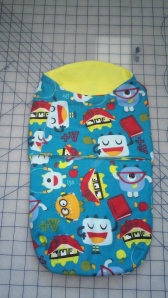
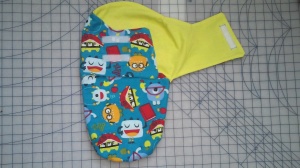
Part II of the recent baby shower gift I put together. These snuggler swaddle wraps seem to be popping up on all the registries lately and so I thought perhaps I would make a pattern so my lovely friends could have them in patterns of their choice (instead of the limited styles they have at the store). I made this one as part of the most recent baby shower gift I put together and in doing so I was able to make it out of really cute flannel monster fabric…and I was able to save $20.00 over the cost of the swaddler at Target. The way I see it…that’s win/win. After all If I can make it for less….my friends get more 🙂

 20141118_154245

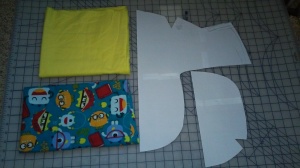
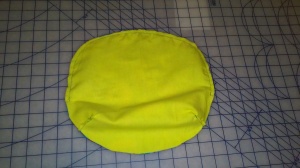
First I started by googling snuggle swaddlers so I could break down the pieces needed to create one of my own. There are a surprising number of free patterns from sewing to knitting. I took the opportunity to really assess a few for sewing and then drew out my own. Above is the pattern I made by taping together a few pieces of paper (I used some from the last presentation I went to at work so as not to waist fresh printer paper but do as you like. News paper works well for patterns as well and allows for less taping on small projects like this) and then drawing and cutting out the basic pattern. The straight areas of these patterns line up with the center fold of the fabric you are using. Next iron fabric and cut out both pieces twice (once for the outer shell and once for the liner)

20141118_164609  20141123_094243

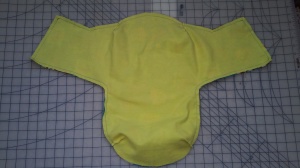
Next sew together pleats where all of the triangle cut outs appear in the pattern above -2 sets at the feet and one set at the shoulders (as you can see I added two pleats to the bottom of the main piece so it would line up with and match the front pocket piece). Then line up your outer shell and your liner (with the outer patterns facing in and sew from foot pleat to foot pleat leaving an opening between the pleats. Turn both pieces right side out and iron.

   20141123_100526 20141123_100638

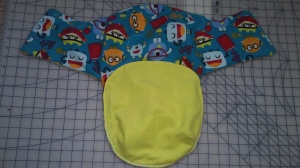
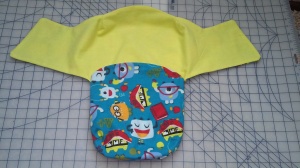
With the outer shell patterns facing in again line up the bottom foot pleats of the main body and the front pouch and sew from armpit to armpit. I used my surger to finish off the fabric at the toes to remove all raw edges. Then flip right side out for an almost completed project. At this point you can happily hold up your very recognizable swaddler and parade around the room proudly showing what you have accomplished.

20141123_104525   20141123_100657

Finally attach Velcro as your securing method. I placed a strip of Velcro on the top of the front pouch for the first fold. I placed two pieces horizontally and one piece vertically for the second fold (this allows the front piece to be adjustable based on the size of the baby).

**Update…the swaddle and sleep sack were a great success. Another successful baby shower gift complete.

Leave a comment

Filed under Budget, Children, Crafts and Gifts, DIY, Family, Motherhood, parenting

DIY Baby Sleepsack

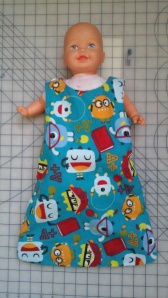
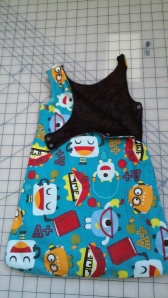
20141117_124520 Baby sleepsacks are all the rage throughout the winter months as they keep new babies nice and warm without new parents having to worry about bulky blankets which are a risk for smothering and infant death. Sleepsacks can be purchased at just about every baby store and online registry these days…but many are expensive and there are limited prints and styles. Here is one I made as a baby shower gift for a friend – the total cost was (hopefully my friend doesn’t see this post) about $5.00. There are many variations (zippers in the front instead of snaps, or Velcro along the sides, or even kimono style wrap front designs), no matter which style you choose these are always sure to be a big hit.

20141114_180354

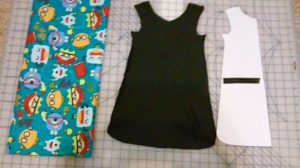
I started by picking a fabric I knew my friends would enjoy (they had registered for other fun monster print items) and then I mapped out a pattern. If you already have a sleepsack handy you can literally just trace the one you have. If you don’t you can make a paper pattern by looking up different styles as I did here. (I also used a baby onesie (3-6months) when creating the pattern to ensure the neck and arm holes would be big enough for baby to fit into them comfortably.)

20141114_182814

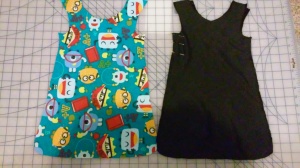
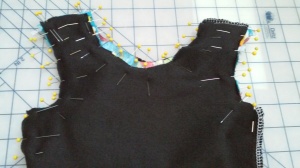
Next cut out the pattern  x 4- front and back of the outside and front and back of the liner. I used a crushed velvet material for the liner and a flannel for the outer shell. Then sew from armpit to armpit leaving about 3 inches of space on one side (this will allow the sleepsack to open so the baby can be placed inside). You can see my opening where I have left pins in the liner.

20141117_111747  20141117_112849

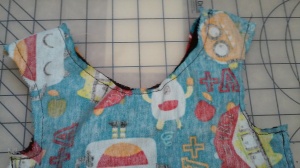
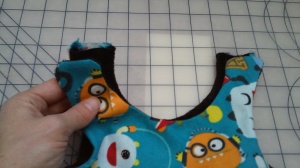
Flip the two pieces inside out and stuff the outer shell into the liner and sew together the arm pit holes and the yolk of the neck. You can close the top of 3 shoulders but leave one open so you can turn the sack right side out.

20141117_113600  20141117_113702

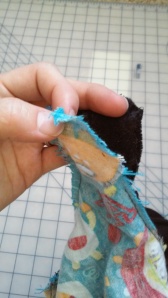
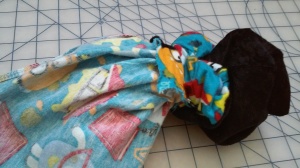
Open the whole you have left at the top of the shoulder and proceed to stuff the sack through it turning the whole thing right side out.

20141117_115021

Now you only need to close up one hole and get ready to add buttons or snaps. I used a blind hem to  close the top of the shoulder so it would match the other three however you can use a straight stitch over the top after you tuck in all the raw unfinished edges.

20141117_124306

Finally add buttons to the top for a clean finished look and snaps to the insides of one shoulder and the open side. I used the button on the left to secure the left shoulder (it doesn’t open). The button on the right is just for decoration as safety snaps are what the parents actually use to close the garment up. Vowalla one happy custom sleepsack ready for a new baby.

Leave a comment

Filed under Budget, Children, Crafts and Gifts, DIY, Family, Motherhood, parenting

DIY baby fairy or ballerina

 IMG334 IMG335

I originally made these little tutu’s as a baby gift for a friend but just love them as regular dress up box items or fun, quick and easy Halloween costumes for the little ones. Whether this costume is to play in around the house, or wear over to Grandma’s for the first Halloween Oooooo’s and Ahhhh’s, these little skirts are sure to please! Here’s how you make them…

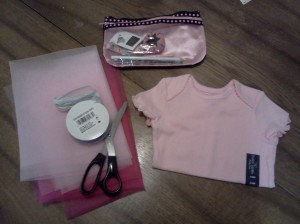
First assemble your needed supplies… elastic for the waist band (measure a little snug or short the measurement by an inch or two on the baby or child so that it still fits once you add all the fluff), needle and thread, measuring tape, pins, scissors, and tulle/ribbon in various colors.

IMG326

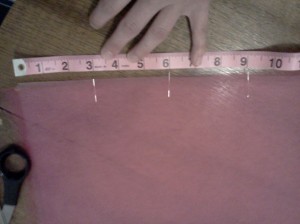
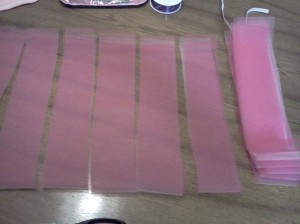
Lay out the tool on a flat cutting surface – measure and mark the width you want your strips to be -and place a pin in each to hold them together? I doubled over the tulle I had, and then layered three pieces together so I could cut the whole skirt all at once. If you have a rotary cutter and sewing mat this process goes crazy quick! (Remember to make the length of the strips twice the length you want them to be for the finished skirt. Each piece will be folded over and looped around the waist band as the attachment method.)

IMG328 IMG329

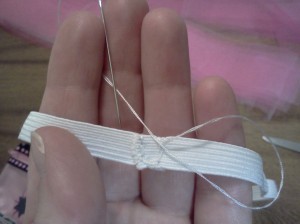
Once you have all of your strips of ribbon and tulle cut into equal lengths, make your waist band for them to loop around. Make sure to make the waist a little smaller than the actual child. Once you start adding the fluff the elastic will stretch a bit and the final size will actually be bigger than you start with.

IMG331

Finally Take two to three pieces of tulle at a time or a piece of tulle and a piece of ribbon and match them up one on top of the other. fold all three pieces in half and loop them around the waist band making a small knot at the waist band to hold them in place. You want to make sure to have multiple layers of tulle in each loop to ensure the skirt is nice and full. Also having multiple colors in each loop creates a nice depth and whimsy.

IMG332

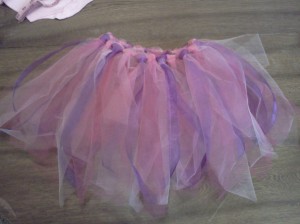
Aaaaaaaand vowala you have an adorable and fun tutu or fairy skirt in no time!

Leave a comment

Filed under Budget, Children, Crafts and Gifts, DIY, Halloween, Party Planning

Fruit Sushi

Created with Nokia Smart Cam

I have always loved the look of sushi. It looks wonderful as it comes to the table (you just know a lot of work and love went into making it). Unfortunately I happen to be allergic to fish…like all fish! So sadly I have never been able to have sushi. For many years I wanted to make sushi for a party even though I couldn’t have it, but recently was struck by lightening as I thought (why not just make sushi you can actually eat?! Sushi with fish isn’t the only sushi out there!) I had a few ideas in mind but decided to google fruit sushi to see what other people may have tried (what worked and what failed) and I found an overwhelming number of great recipes from home chefs all over the world. Here are two websites that I used and/or took inspiration from.

Fruit Sushi — Sushi de fruits

http://www.sheknows.com/food-and-recipes/articles/1035627/fruit-sushi-recipe

I started with these ideas and recipes and then made my own variations. It all turned out wonderful and was a great hit at the dinner party I took it to…but I think in the future I will also make some dipping sauces to go along side of these pretty little treats. After all regular sushi has soy sauce…why shouldn’t fruit sushi have a raspberry and balsamic glaze for dipping!?

In addition to the recipes from these two sites I also made up my own sushi roll and the recipe is as follows…

  • 4 pieces of prosciutto slightly overlapping on a piece of parchment paper.
  • Then add a thin layer of the rice pudding/sticky rice.
  • Layer sliced figs (or dates) and goat cheese in the center

When you roll up the sushi really press the whole thing together pretty tight so the rice doesn’t fall out when cutting. Then once you have your neat slices, turn them on the side to show your lovely design and enjoy.

Leave a comment

Filed under DIY, Food and Drink, Party Planning, Recipes

DIY Wedding Dress

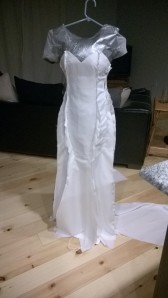
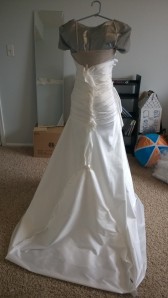
Back in April I had the great privilege of making a wedding dress for a good friend of mine. I hadn’t made a wedding dress since I worked in the costume department during my college years (so needless to say I was a bit rusty), but I had a friend in need and so I set out to make the dress she had been envisioning for the last year. Truthfully, my friend had been very wise and had picked out and ordered her dress a year before the wedding. However, when the dress arrived a mere 3 weeks before the wedding it wasn’t right. From the fabric, to the design, all the way to the size the dress was wrong. Panicked and overwhelmed with the final weeks of wedding planning she had resigned herself to buying a simple cocktail dress at a department store to get married in…but for me that simply wouldn’t do! So one duct tape manikin, 6 yards of dupioni silk, and 72 pearl buttons later I was helping her into her dress for the wedding. AND I am happy to report she was happy with the final product! Here is a quick breakdown (in pictures) of how I made her dress in 3 weeks (while still working my normal job, cleaning my house, and attending pre-wedding / bachelorette functions etc 🙂

First we bought a long night shirt and a roll of duct tape and I made a duct tape manikin of my friend. (By doing this I was able to make the dress to fit her perfectly from the start. We didn’t have time for extra alterations later.

 Created with Nokia Smart Cam

Next I created the general shape of the dress with a basic white satin (this will become the under slip and guide for the rest of the dress). My friend wanted a deep sweetheart neck line, low back and mermaid fit through the hips…so I pinned and created seams accordingly. (I also added corseting style boning and cups at this point so my fiend wouldn’t have to worry about an uncomfortable strapless bra. This dress was made to stay up throughout the ceremony and party without any unsightly tugging or adjusting!)

Created with Nokia Smart Cam Created with Nokia Smart Cam

Always make sure you look at the dress from every angle ensuring you have extra fabric for finishing seams and zippers later!Created with Nokia Smart Cam

Next I began laying the Dupioni silk over the top of the Satin under dress. Achieving the right look with ruching or folds can be difficult. If you are going to attempt this type of project take as much time as you need at this point and get the fabric to lay properly. Pin and re-pin as necessary without getting discouraged. Trust me it’s worth it in the end to do it right at this point 🙂

Created with Nokia Smart Cam Created with Nokia Smart Cam

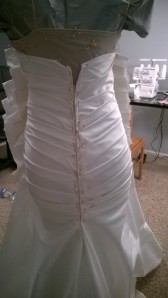
Once I had the front pinned I began working on the back. To some degree the back of the dress can be more difficult than the front as a result of the zipper. For this dress I started by creating the folds on one side of the zipper and then moved to the other side working to ensure everything would match up perfectly once the dress was zipped.

Created with Nokia Smart Cam Created with Nokia Smart Cam

Next I closed all of the seams (which can be tricky keeping all of your ornate folds in place properly and the only piece of advice I can give is lots of pins and lots of patience!)

Created with Nokia Smart Cam

Next (and I’m sorry I don’t have pictures of this part) turn your new lovely dress inside out and sew the top of the under dress to the actual wedding dress and then turn right side out again. This will create an invisible hem at the bust line and a clean finish to the whole dress effectively hiding all of your seams (the seams of the dress face the seams of the under dress so you can’t see the seams at all). Once this is complete ensure the bust line is laying properly and make any adjustments necessary to ensure it won’t bubble or pucker.

 Created with Nokia Smart Cam Created with Nokia Smart Cam

Finally insert zipper using the invisible zipper method, attach buttons down the back of the dress covering the zipper (if desired), add any details such as rhinestones or feathers you wish to have, and hem the bottom (You will need your lovely bride to be in her wedding shoes of choice for this last measurement). Vowalla one wedding dress custom made and ready to wear.

Created with Nokia Smart Cam(I also added a bustle to the back of this dress so she could dance the night away without worrying about people stepping on the train.)

Leave a comment

Filed under Budget, Crafts and Gifts, DIY, Education, talents

How to: Grout Tile Flooring

How To: Grout Tile Flooring

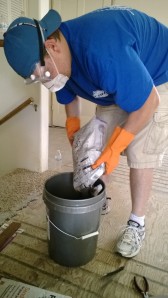
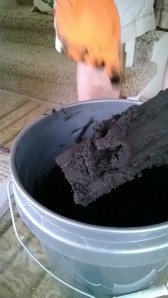
Step 1: Pick out the type of grout you need for the space you are using (we used sanded grout for flooring). Decide on color and then mix in a large bucket per manufacturers instructions. Make sure to wear proper protective equipment while mixing as the grout dust will fly up and get into your eye’s, nose and mouth if you don’t (yuck!). Once the water is thoroughly mixed in allow the grout to set up – it should be about the consistency of damp beach sand when it is ready to use.

WP_20130905_005 WP_20130905_008 WP_20130905_009

Step 2: Begin work in the corner furthest from the exit door, and work your way out of the room. Using a tile float (looks like a tile trowel but the base is rubber or foam instead of metal) scoop up a large amount of grout and begin to work it into the seams between the tiles. If you have smaller tiles you can drag the grout all the way across the tiles in sweeping patters to push the grout into all of the seams. We are laying larger tiles here and so we focused around the seams. You do need to work the grout in using multiple directions in order to force as much grout into the joint as possible. This will help to create a strong bond and keep your floors in great condition for years to come.

WP_20130905_012 1233356_10151827206079246_757282206_n[1]

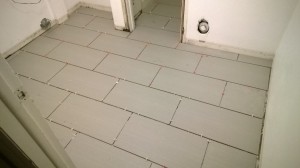
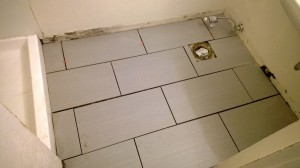
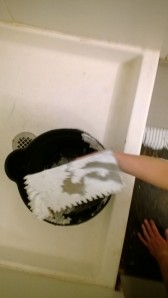
Step 3: Allow the grout to set up for approx. 30min depending on the manufacturers instructions. Once it has had the initial set up time using a damp sponge begin to remove the excess grout from the top of the tiles.

image image

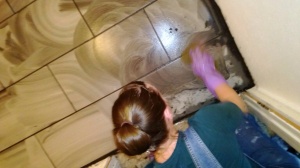
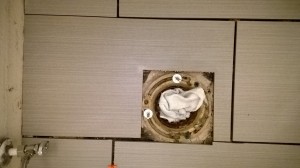
Work in a circular motion with a lite touch to ensure you don’t pull grout out of the seams. There will still be a haze over the floor, this is okay. Allow the grout to set up another 2 hrs or so (again refer to manufacturer guidelines) and then go over the tiles again with a barely damp sponge or cloth. Wipe up the haze and then go over it with a dry cloth after. Once the tiles are clean allow the grout to cure for a few days.

Step 4: Step back and admire your newly grouted tile floor. Allow floors to cure for a few days before moving onto sealing.

1234891_571146352932982_362969598_n[1]

Step 5: If you have made it this far in your floor improvement project…Congratulations you are only one step away from being done! With the commercial sealer of choice in hand start once again in the back corner of the room and run a thin line of grout sealer over each joint. Do not wash over tile with sealer…stick to the grout! Allow first coat to sit for 20 minutes and then go over the grout again. Then allow the sealer to sit overnight and vowalla…you are done! Clean out the tools, repaint your walls, put your floor boards back up, and start using your lovely new floor!

WP_20130910_001

Leave a comment

Filed under Budget, DIY, Education, Home and Lawn

How To: Lay Tile Flooring

How To: Lay Tile Flooring

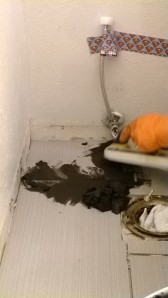
Step 1. Remove all previous flooring, base boards, fixtures (toilets/sinks) and adhesive from the floor in the room you wish to tile. Be sure the floor surface is clean and free from all debris. If the subflooring is particle board, hardwood, etc (non cement) you will need to lay cement backer board first.

WP_20130806_011

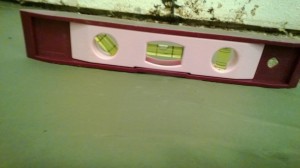
If you have cement flooring you don’t need backer board but you will need to check to see if the floor is level. If there are spots that need repair make sure to fix them first and give the area a few days to cure before beginning.

   WP_20130810_017

Step 2. Once your floor is prepped decide what pattern you want for your tiles and create a layout.

WP_20130822_012

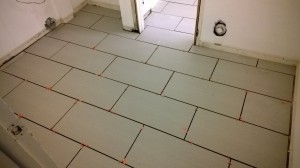
Step 3. Measure and cut all tiles needed to complete your layout. Do not begin setting any tiles until you have a full room layout. This ensures you won’t find yourself in a pickle (such as being one tile short) when attempting to lay your flooring.

WP_20130822_003

Step 4. Ensure all difficult cuts line up well and maintain proper spacing once installed. Adjust as necessary. Measure twice…cut once.

WP_20130822_005 WP_20130822_004

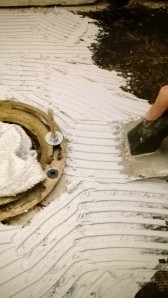
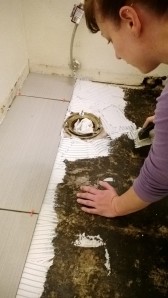
Step 5. With your full room layout complete and all tiles cut you can begin laying your tile. Begin work from the furthest point away from the exit door so that you don’t have to walk on or disturb the tile once you have begun. Start by removing two rows from your layout at a time (Keep tiles in order as you remove your two rows so you can quickly and easily grab each tile as you go). With a notched trowel scoop up a large amount of tile adhesive and begin to spread it across the floor evenly using multiple strokes to drag and pull the adhesive. Only apply enough adhesive to lay 1-2 tiles at a time to prevent the adhesive from beginning to dry before laying (I did about one tile at a time because the tiles I used were large). Take your time and make sure your tiles fit back into the layout you created as you go.

WP_20130822_010 WP_20130822_011 WP_20130822_009

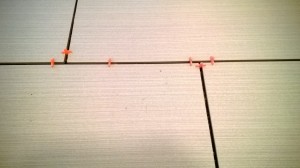
Step 6. Place tile spacers between your tiles as you lay them to ensure you maintain the same width/gap between each tile. This will be important for grouting and the over all look later.

WP_20130822_006

Step 7. Once you have worked your way out of the room and placed your last tile…step back and admire your handiwork. Now walk away and let your new tile cure for a few days before moving on to grouting and sealing.

WP_20130822_007

5 Comments

Filed under Budget, DIY, Education, Home and Lawn

How to: Remove Laminate Flooring

How To: Remove Laminate Flooring

1. Identify the room you wish to change the flooring in.

WP_20130806_003

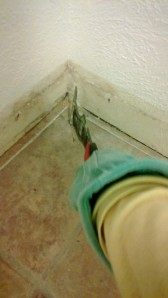
Step 2. Remove baseboards, decorative molding, etc from around the perimeter of the room (occasionally this may not be over the top of the laminate but you will want to pull it up anyway so you can place your new floor properly.)

WP_20130806_004

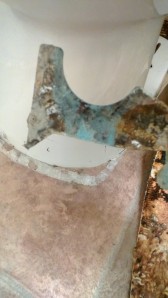
Step 3. Use a box cutter or multi-use tool to cut the silicone seal around the base of any fixture you are not removing before or at the same time as the flooring (these fixtures should however be removed prior to laying the new flooring. (It is never wise to lay new flooring around an existing fixture such as a toilet or sink. In the event of an accident or leak down the road having access to the base of these fixtures is very important.)

 WP_20130806_006 WP_20130806_007

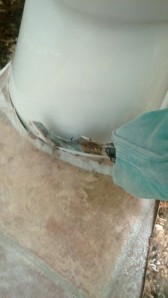
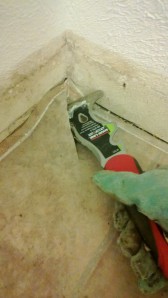
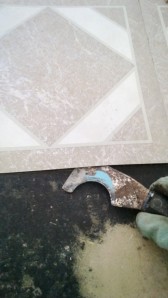
Step 4. Using your same multi-use tool (I’m using my SHUR LINE 10 in 1 tool available at the local hardware store http://www.lowes.com/pd_178391-1077-07217_0__?productId=3018291 ) or utility knife start in the corner of the room furthest from the door. Cut a line straight out from the corner, use the edge of your multi-tool to get underneath the laminate flooring and lift along the cut area. Then grab with your gloved hand (It will be very sticky under the laminate) and pull.

WP_20130806_008 WP_20130806_009 WP_20130806_010 WP_20130806_005

Step 5. Remove all laminate from the floor working toward the door so you don’t have to step on the adhesive under the laminate (which will stick to the bottom of your shoes and then come off somewhere else in your house you don’t want to find it). The laminate may come up in one piece if you are lucky…or if (like this room) the previous owners used black tar to adhere  the laminate to the subflooring you may be in for a bit more work. The laminate in this room was very difficult to peal up and I had to take it out in strips. Eventually I worked out a system where I would muscle up a piece large enough to hold on to and then I would squat and lean back so my backside could do the heavily lifting for me (What can I say it was one of those times I felt thankful for all that junk in my trunk lol). It was a lot more work than I expected but in the end I had a room free of laminate and ready for cleaning to start the tiling process!

WP_20130806_011

Step 6. Admire your laminate free floor before heading to the store to pick up adhesive remover.

WP_20130806_013 WP_20130806_014

Side note…here is the other bathroom I have removed the laminate flooring in. In this room the previous owners used self sticking individual laminate squares. The adhesive on these is much less durable than the black tar adhesive used for large sheets of laminate…as a result these squares came up very easy. Simply place the tip of your multi-tool under the edge of each square and pop them up! A few stuck better than others, but on whole the process in this bathroom was very easy.

Congratulations you just removed your old laminate flooring!

3 Comments

Filed under Budget, DIY, Education, Home and Lawn

Girls vs Dinner Eggplant Parmesan & Fruit Salad

WP_20130901_072

The last week of August and first week of September were busy times for the two of us here at Girls vs Blog. In addition to our regular daily activities and stresses we were also preparing for Katie’s baptism. Of course such a momentous occasion could only mean one thing…Road Trip! Well..for one 🙂

After having finished Katie’s dress (mostly… I may have done a few things the night before the baptism) I packed up my little car and began the trip out to Utah. The great thing about these occasions and trips is time with friends and family and of course both Girls vs Bloggers in one room…working on projects and cooking food and having fun together!  This trip was no different, and while many times we find ourselves so excited about getting to visit we forget to take pictures of our adventures…this time we managed to capture dinner.

With two spunky girls in the kitchen (and a handful of little ones running around helping) how could dinner be anything but fantastic…not to brag or anything. So here it is…Eggplant Parmesan and a delicious fruit salad topped with a lime, honey, mint dressing. Enjoy!

We began by making a trip through the pantry to see what we had on hand and then made a trip to the store to see what was fresh. As luck would have it Eggplants were piled high, looking delicious and ON SALE! We picked up two to feed 9 people and had left overs to take next door to the neighbor. Next we strolled through the fruit section and found fresh berries were on sale…so into the basket they went as well. With a game plan in place we assessed what we had seen in the pantry at home and then picked up a few remaining ingredients like panko bread crumbs and one or two extra tomatoes (as we weren’t sure there were enough from the garden).

Step 1: Gather all ingredients so you don’t have to run around the kitchen looking for stuff halfway through

WP_20130901_045

Step 2: Slice eggplant into 1/4-1/8in thick sections and place on a wire rack. Salt the slices liberally then set aside with paper towels or kitchen towels under the racks. This allows the additional moisture to come out of the eggplant which keeps the outer crust crispier later and makes for more even cooking.
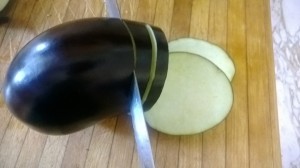
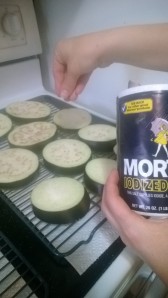
WP_20130901_049 WP_20130901_050

Step 2: Prep for tomato sauce. Gather your fresh picked or purchased tomatoes and place them on a baking sheet. Coat tomatoes in olive oil, salt and pepper and place in a 350 degree oven for 10-20 minutes or until the skins begin to roll and peel away from the flesh. If skins can be easily removed they are done…if they are still difficult to remove and are taking flesh with them when you peel back place the tomatoes back in the oven for a few more minutes.


WP_20130901_051 WP_20130901_052

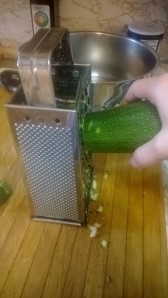
Remove tomatoes from oven and set aside to cool slightly before peeling. While tomatoes are cooling grate a zucchini (we are about to hide some super nutritious veggies in this delicious sauce. The kids won’t even know they are there!) As luck would have it our girls actually like the veggies so I don’t really have to hide them…but I still like to grate the zucchini because it disperses the flavor well and thickens the sauce! Then peel the tomatoes and set aside.
WP_20130901_053 WP_20130901_056

Step 3: Remove casing from your italian sausage of choice (we used spicy italian chicken sausage) and place it in a hot pot. Immediately begin to break up the sausage with a wooden utensil. Once the sausage has begun to render its fat add one whole diced onion and saute until the onion is translucent and the meat has finished cooking. Then add 2-3 cloves crushed garlic, grated zucchini, and any other veggies you are slipping in (I also grated the thick ends of the eggplant and added them in). Sauté until veggies are soft and garlic is fragrant.

WP_20130901_054 WP_20130901_055

Step 4: Dice, crush or otherwise destroy your lovely roasted tomatoes and add them to the pot along with a few hardy palms full of your favorite italian seasoning combination (we make up our own each time adding spices such as basil, parsley, oregano, pepper, cumin,  paprika, thyme, crushed red pepper, etc). Then reduce heat and let sauce simmer while you complete the rest of dinner (add a palm full of sugar to the sauce at the end…right before serving to brighten the tomatoes and round out the sauce. Don’t add it earlier or the sugars can scorch!)

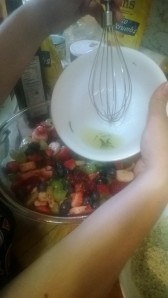
Step 5: Prepare fruit salad! We added grapes, raspberries, blue berries, strawberries and banana’s. Rinse all fruit and slice the grapes in half and the strawberries into quarters. Add all fruit to a bowl and toss with dressing. Dressing = 2-3 fresh limes squeezed, equal parts honey and a splash of oil whisk together. Then add freshly chopped mint leaves and whisk again before poring over salad. Toss all fruit and dressing to combine and then set aside to allow the flavors to marry while you finish dinner.

WP_20130901_058 WP_20130901_060

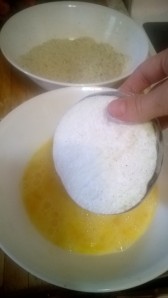
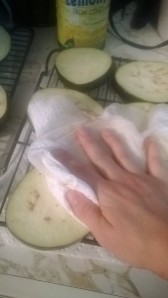
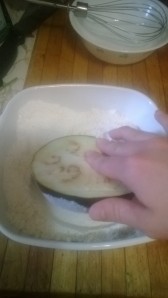
Step 6: Your Eggplant should have a nice layer of moisture sitting on the top at this point showing you that it is ready to get started. Pat all dry (pushing down a little as you do to squeeze out remaining liquid). Then follow the three-step process for coating – dredge, wash, coat. Dredge in seasoned flour (seasoned with S&P)
WP_20130901_061 WP_20130901_062

Dip in egg wash.

WP_20130901_063 WP_20130901_064

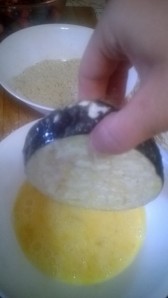
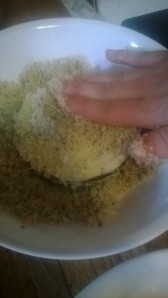
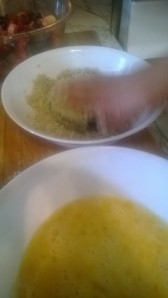
Coat in bread crumb mixture. Bread crumb mixture is 2/3 panko to 1/3 traditional bread crumbs. Add the same spices you added to the sauce to the crumbs so your eggplants are well seasoned and tasty; as well as a handful of parmesan cheese. Finally add enough olive oil to make the mixture the consistency of beach sand. The reason we add the olive oil here is so we get a nice crispy crust without frying! You may need to pack on the crust with your fingers. Once you have a nice even coating place onto a cooking sheet lined with parchment paper.
WP_20130901_065 WP_20130901_066

Bake in a 350 degree oven for 25-35 minutes or until the outside is crispy golden brown and the inside is cooked through. Turn once halfway through cooking to allow both sides to brown evenly. While these are cooking – make your pasta and any h’orderves/breads you wish to serve.

WP_20130901_069

While making dinner we gave the little girls projects so they could help with dinner too! They cleaned and set the table. Picked out which dish they wanted to use (they wanted to pull out the fancy glasses and parfait cups for this occasion), and then we had them create name cards for each person at the table. The eldest two girls wrote the names on the cards and all 4 girls helped to color and decorate them.

WP_20130901_071

Once the eggplant is done, the pasta is ready and the table is set it’s time to plate. We served the fruit salad in parfait glasses as a kind of desert salad. On a main plate add pasta, tomatoe sauce and top with a few slices of eggplant. Then top everything with freshly grated parmesan cheese and enjoy!

WP_20130901_072

Bon Appetit!

Leave a comment

Filed under Budget, Children, DIY, Education, Family, Food and Drink, Recipes

DIY : Baby Superhero Cape

How To: Make a Superhero Cape for a Onesie

I love sewing and working on special little projects for friends and family; so when I received a baby shower invitation from a friend I pulled out the sewing machines! My friends John and Jane (we shall call them for this post) are big comicon fans and love all of the new superhero movies so much that I knew almost immediately what I wanted to make for them….baby superhero onesies! Then as luck would have it, while I was looking for plain blue and red onesies, I found actual superhero embossed onsies and so all that was needed was the cape. Below are instructions on my latest baby shower gift. I am very pleased with how they turned out!

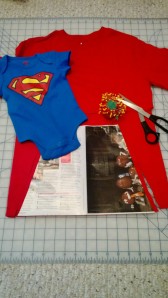
Step 1: Find onesie and fabric for cape (I couldn’t find the right shade of red in the fabric department so I decided to check out the T-shirts in the little kids section…vowalla cape material!) Create cape pattern (I like to cut my patterns out of old newspapers before cutting the actual fabric. This allows me to make adjustments as needed without loosing fabric and money!)

WP_20130817_001

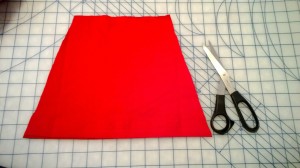
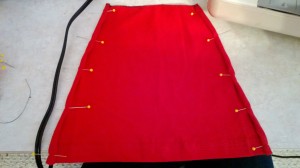
Step 2: Cut out cape pattern. Because I was using a T-shirt I lined up the bottom of the cape with the bottom hem of the shirt. The ending result is one less hem to sew and a nice clean finished look to the bottom of my cape!

WP_20130817_002

Step 3: Break out your handy dandy sewing machines! (If you don’t sew or don’t have sewing machines you could do this project “no sew” by using fabric glue for the seams and self adhesive Velcro to attach the cape to the neckline of the onesie)

WP_20130817_003

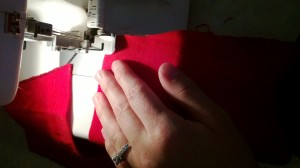
Step 4: Create a zig-zag stitch on the three unfinished (rough) sides to prevent fraying or curling of the T-shirt material. I used my Surger machine (I love this thing!!!)

WP_20130817_004

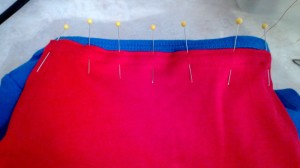
Step 5: Roll your hems and pin in place. Sew a straight line hem on each side and across the top creating a finished look.

WP_20130817_006

Step 6: With all three sides now hemmed attach your cape to the neckline of your onesie. I attached just below the original hem because I liked how the blue over the top of the red looked. You can also attach right to the top of the onesie if you prefer. Use a straight stitch to attach. (Or if you want the cape to be removable use Velcro or snaps to attach the cape to the shoulders.)

WP_20130817_007

Step 7: Step back and admire your crazy adorable baby superhero outfit! Then wrap it up and happily gift this really fun item! Or if you are making them for your own little superheroes enjoy watching them zoom around the room in their new capes!
WP_20130817_008

Leave a comment

Filed under Budget, Children, Crafts and Gifts, DIY, Education, Family, Motherhood