Back in April I had the great privilege of making a wedding dress for a good friend of mine. I hadn’t made a wedding dress since I worked in the costume department during my college years (so needless to say I was a bit rusty), but I had a friend in need and so I set out to make the dress she had been envisioning for the last year. Truthfully, my friend had been very wise and had picked out and ordered her dress a year before the wedding. However, when the dress arrived a mere 3 weeks before the wedding it wasn’t right. From the fabric, to the design, all the way to the size the dress was wrong. Panicked and overwhelmed with the final weeks of wedding planning she had resigned herself to buying a simple cocktail dress at a department store to get married in…but for me that simply wouldn’t do! So one duct tape manikin, 6 yards of dupioni silk, and 72 pearl buttons later I was helping her into her dress for the wedding. AND I am happy to report she was happy with the final product! Here is a quick breakdown (in pictures) of how I made her dress in 3 weeks (while still working my normal job, cleaning my house, and attending pre-wedding / bachelorette functions etc 🙂
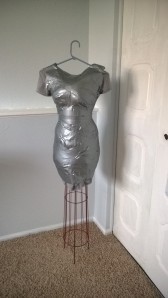
First we bought a long night shirt and a roll of duct tape and I made a duct tape manikin of my friend. (By doing this I was able to make the dress to fit her perfectly from the start. We didn’t have time for extra alterations later.
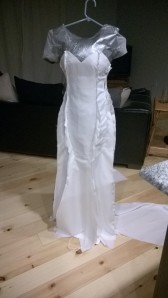
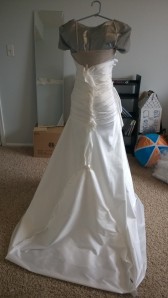
Next I created the general shape of the dress with a basic white satin (this will become the under slip and guide for the rest of the dress). My friend wanted a deep sweetheart neck line, low back and mermaid fit through the hips…so I pinned and created seams accordingly. (I also added corseting style boning and cups at this point so my fiend wouldn’t have to worry about an uncomfortable strapless bra. This dress was made to stay up throughout the ceremony and party without any unsightly tugging or adjusting!)

Always make sure you look at the dress from every angle ensuring you have extra fabric for finishing seams and zippers later!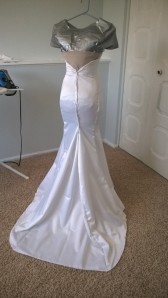
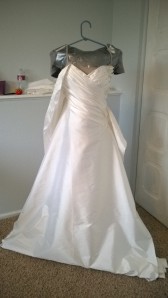
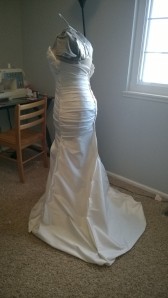
Next I began laying the Dupioni silk over the top of the Satin under dress. Achieving the right look with ruching or folds can be difficult. If you are going to attempt this type of project take as much time as you need at this point and get the fabric to lay properly. Pin and re-pin as necessary without getting discouraged. Trust me it’s worth it in the end to do it right at this point 🙂

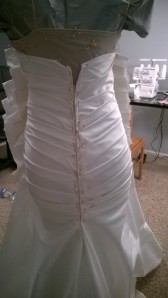
Once I had the front pinned I began working on the back. To some degree the back of the dress can be more difficult than the front as a result of the zipper. For this dress I started by creating the folds on one side of the zipper and then moved to the other side working to ensure everything would match up perfectly once the dress was zipped.
Next I closed all of the seams (which can be tricky keeping all of your ornate folds in place properly and the only piece of advice I can give is lots of pins and lots of patience!)
Next (and I’m sorry I don’t have pictures of this part) turn your new lovely dress inside out and sew the top of the under dress to the actual wedding dress and then turn right side out again. This will create an invisible hem at the bust line and a clean finish to the whole dress effectively hiding all of your seams (the seams of the dress face the seams of the under dress so you can’t see the seams at all). Once this is complete ensure the bust line is laying properly and make any adjustments necessary to ensure it won’t bubble or pucker.


Finally insert zipper using the invisible zipper method, attach buttons down the back of the dress covering the zipper (if desired), add any details such as rhinestones or feathers you wish to have, and hem the bottom (You will need your lovely bride to be in her wedding shoes of choice for this last measurement). Vowalla one wedding dress custom made and ready to wear.
 (I also added a bustle to the back of this dress so she could dance the night away without worrying about people stepping on the train.)


