Tag Archives: Gift

DIY Baby Sleepsack

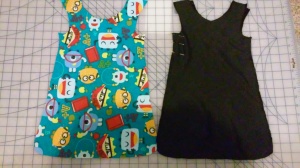
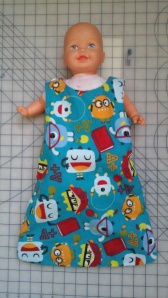
20141117_124520 Baby sleepsacks are all the rage throughout the winter months as they keep new babies nice and warm without new parents having to worry about bulky blankets which are a risk for smothering and infant death. Sleepsacks can be purchased at just about every baby store and online registry these days…but many are expensive and there are limited prints and styles. Here is one I made as a baby shower gift for a friend – the total cost was (hopefully my friend doesn’t see this post) about $5.00. There are many variations (zippers in the front instead of snaps, or Velcro along the sides, or even kimono style wrap front designs), no matter which style you choose these are always sure to be a big hit.

20141114_180354

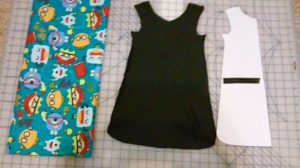
I started by picking a fabric I knew my friends would enjoy (they had registered for other fun monster print items) and then I mapped out a pattern. If you already have a sleepsack handy you can literally just trace the one you have. If you don’t you can make a paper pattern by looking up different styles as I did here. (I also used a baby onesie (3-6months) when creating the pattern to ensure the neck and arm holes would be big enough for baby to fit into them comfortably.)

20141114_182814

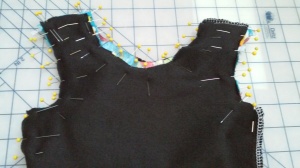
Next cut out the pattern  x 4- front and back of the outside and front and back of the liner. I used a crushed velvet material for the liner and a flannel for the outer shell. Then sew from armpit to armpit leaving about 3 inches of space on one side (this will allow the sleepsack to open so the baby can be placed inside). You can see my opening where I have left pins in the liner.

20141117_111747  20141117_112849

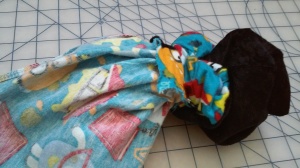
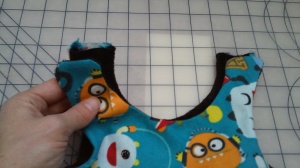
Flip the two pieces inside out and stuff the outer shell into the liner and sew together the arm pit holes and the yolk of the neck. You can close the top of 3 shoulders but leave one open so you can turn the sack right side out.

20141117_113600  20141117_113702

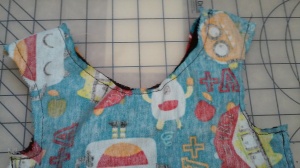
Open the whole you have left at the top of the shoulder and proceed to stuff the sack through it turning the whole thing right side out.

20141117_115021

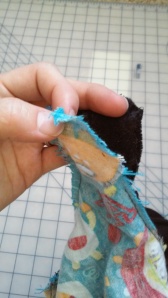
Now you only need to close up one hole and get ready to add buttons or snaps. I used a blind hem to  close the top of the shoulder so it would match the other three however you can use a straight stitch over the top after you tuck in all the raw unfinished edges.

20141117_124306

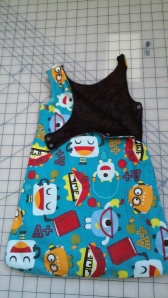
Finally add buttons to the top for a clean finished look and snaps to the insides of one shoulder and the open side. I used the button on the left to secure the left shoulder (it doesn’t open). The button on the right is just for decoration as safety snaps are what the parents actually use to close the garment up. Vowalla one happy custom sleepsack ready for a new baby.

Leave a comment

Filed under Budget, Children, Crafts and Gifts, DIY, Family, Motherhood, parenting

DIY Wedding Dress

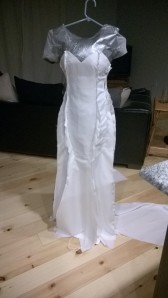
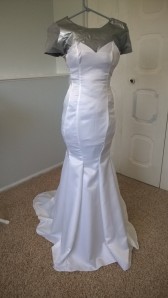
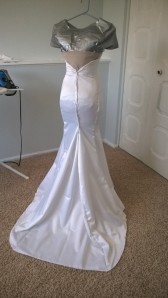
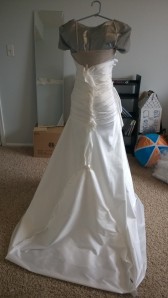
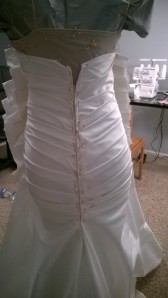
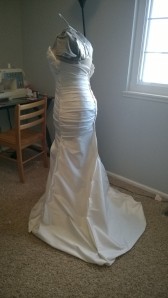
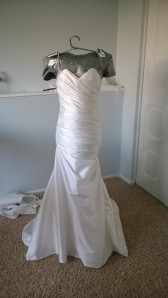
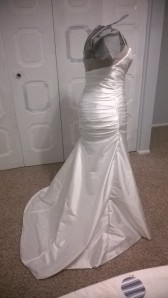
Back in April I had the great privilege of making a wedding dress for a good friend of mine. I hadn’t made a wedding dress since I worked in the costume department during my college years (so needless to say I was a bit rusty), but I had a friend in need and so I set out to make the dress she had been envisioning for the last year. Truthfully, my friend had been very wise and had picked out and ordered her dress a year before the wedding. However, when the dress arrived a mere 3 weeks before the wedding it wasn’t right. From the fabric, to the design, all the way to the size the dress was wrong. Panicked and overwhelmed with the final weeks of wedding planning she had resigned herself to buying a simple cocktail dress at a department store to get married in…but for me that simply wouldn’t do! So one duct tape manikin, 6 yards of dupioni silk, and 72 pearl buttons later I was helping her into her dress for the wedding. AND I am happy to report she was happy with the final product! Here is a quick breakdown (in pictures) of how I made her dress in 3 weeks (while still working my normal job, cleaning my house, and attending pre-wedding / bachelorette functions etc 🙂

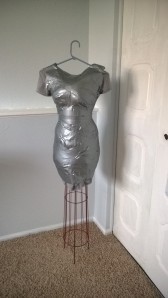
First we bought a long night shirt and a roll of duct tape and I made a duct tape manikin of my friend. (By doing this I was able to make the dress to fit her perfectly from the start. We didn’t have time for extra alterations later.

 Created with Nokia Smart Cam

Next I created the general shape of the dress with a basic white satin (this will become the under slip and guide for the rest of the dress). My friend wanted a deep sweetheart neck line, low back and mermaid fit through the hips…so I pinned and created seams accordingly. (I also added corseting style boning and cups at this point so my fiend wouldn’t have to worry about an uncomfortable strapless bra. This dress was made to stay up throughout the ceremony and party without any unsightly tugging or adjusting!)

Created with Nokia Smart Cam Created with Nokia Smart Cam

Always make sure you look at the dress from every angle ensuring you have extra fabric for finishing seams and zippers later!Created with Nokia Smart Cam

Next I began laying the Dupioni silk over the top of the Satin under dress. Achieving the right look with ruching or folds can be difficult. If you are going to attempt this type of project take as much time as you need at this point and get the fabric to lay properly. Pin and re-pin as necessary without getting discouraged. Trust me it’s worth it in the end to do it right at this point 🙂

Created with Nokia Smart Cam Created with Nokia Smart Cam

Once I had the front pinned I began working on the back. To some degree the back of the dress can be more difficult than the front as a result of the zipper. For this dress I started by creating the folds on one side of the zipper and then moved to the other side working to ensure everything would match up perfectly once the dress was zipped.

Created with Nokia Smart Cam Created with Nokia Smart Cam

Next I closed all of the seams (which can be tricky keeping all of your ornate folds in place properly and the only piece of advice I can give is lots of pins and lots of patience!)

Created with Nokia Smart Cam

Next (and I’m sorry I don’t have pictures of this part) turn your new lovely dress inside out and sew the top of the under dress to the actual wedding dress and then turn right side out again. This will create an invisible hem at the bust line and a clean finish to the whole dress effectively hiding all of your seams (the seams of the dress face the seams of the under dress so you can’t see the seams at all). Once this is complete ensure the bust line is laying properly and make any adjustments necessary to ensure it won’t bubble or pucker.

 Created with Nokia Smart Cam Created with Nokia Smart Cam

Finally insert zipper using the invisible zipper method, attach buttons down the back of the dress covering the zipper (if desired), add any details such as rhinestones or feathers you wish to have, and hem the bottom (You will need your lovely bride to be in her wedding shoes of choice for this last measurement). Vowalla one wedding dress custom made and ready to wear.

Created with Nokia Smart Cam(I also added a bustle to the back of this dress so she could dance the night away without worrying about people stepping on the train.)

Leave a comment

Filed under Budget, Crafts and Gifts, DIY, Education, talents

DIY : Baby Superhero Cape

How To: Make a Superhero Cape for a Onesie

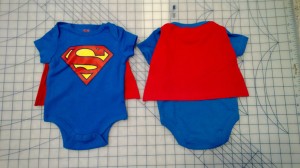
I love sewing and working on special little projects for friends and family; so when I received a baby shower invitation from a friend I pulled out the sewing machines! My friends John and Jane (we shall call them for this post) are big comicon fans and love all of the new superhero movies so much that I knew almost immediately what I wanted to make for them….baby superhero onesies! Then as luck would have it, while I was looking for plain blue and red onesies, I found actual superhero embossed onsies and so all that was needed was the cape. Below are instructions on my latest baby shower gift. I am very pleased with how they turned out!

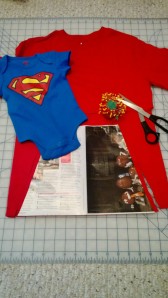
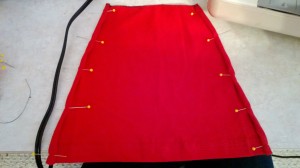
Step 1: Find onesie and fabric for cape (I couldn’t find the right shade of red in the fabric department so I decided to check out the T-shirts in the little kids section…vowalla cape material!) Create cape pattern (I like to cut my patterns out of old newspapers before cutting the actual fabric. This allows me to make adjustments as needed without loosing fabric and money!)

WP_20130817_001

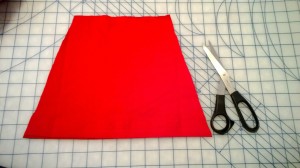
Step 2: Cut out cape pattern. Because I was using a T-shirt I lined up the bottom of the cape with the bottom hem of the shirt. The ending result is one less hem to sew and a nice clean finished look to the bottom of my cape!

WP_20130817_002

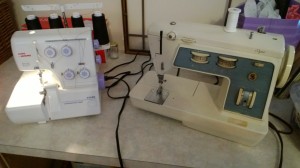
Step 3: Break out your handy dandy sewing machines! (If you don’t sew or don’t have sewing machines you could do this project “no sew” by using fabric glue for the seams and self adhesive Velcro to attach the cape to the neckline of the onesie)

WP_20130817_003

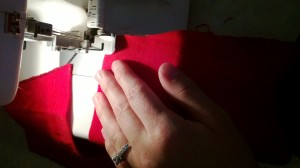
Step 4: Create a zig-zag stitch on the three unfinished (rough) sides to prevent fraying or curling of the T-shirt material. I used my Surger machine (I love this thing!!!)

WP_20130817_004

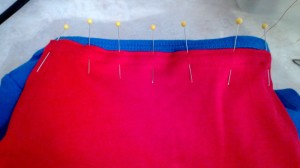
Step 5: Roll your hems and pin in place. Sew a straight line hem on each side and across the top creating a finished look.

WP_20130817_006

Step 6: With all three sides now hemmed attach your cape to the neckline of your onesie. I attached just below the original hem because I liked how the blue over the top of the red looked. You can also attach right to the top of the onesie if you prefer. Use a straight stitch to attach. (Or if you want the cape to be removable use Velcro or snaps to attach the cape to the shoulders.)

WP_20130817_007

Step 7: Step back and admire your crazy adorable baby superhero outfit! Then wrap it up and happily gift this really fun item! Or if you are making them for your own little superheroes enjoy watching them zoom around the room in their new capes!

WP_20130817_008

Leave a comment

Filed under Budget, Children, Crafts and Gifts, DIY, Education, Family, Motherhood