Tag Archives: Floor

How To: Lay Tile Flooring

How To: Lay Tile Flooring

Step 1. Remove all previous flooring, base boards, fixtures (toilets/sinks) and adhesive from the floor in the room you wish to tile. Be sure the floor surface is clean and free from all debris. If the subflooring is particle board, hardwood, etc (non cement) you will need to lay cement backer board first.

WP_20130806_011

If you have cement flooring you don’t need backer board but you will need to check to see if the floor is level. If there are spots that need repair make sure to fix them first and give the area a few days to cure before beginning.

   WP_20130810_017

Step 2. Once your floor is prepped decide what pattern you want for your tiles and create a layout.

WP_20130822_012

Step 3. Measure and cut all tiles needed to complete your layout. Do not begin setting any tiles until you have a full room layout. This ensures you won’t find yourself in a pickle (such as being one tile short) when attempting to lay your flooring.

WP_20130822_003

Step 4. Ensure all difficult cuts line up well and maintain proper spacing once installed. Adjust as necessary. Measure twice…cut once.

WP_20130822_005 WP_20130822_004

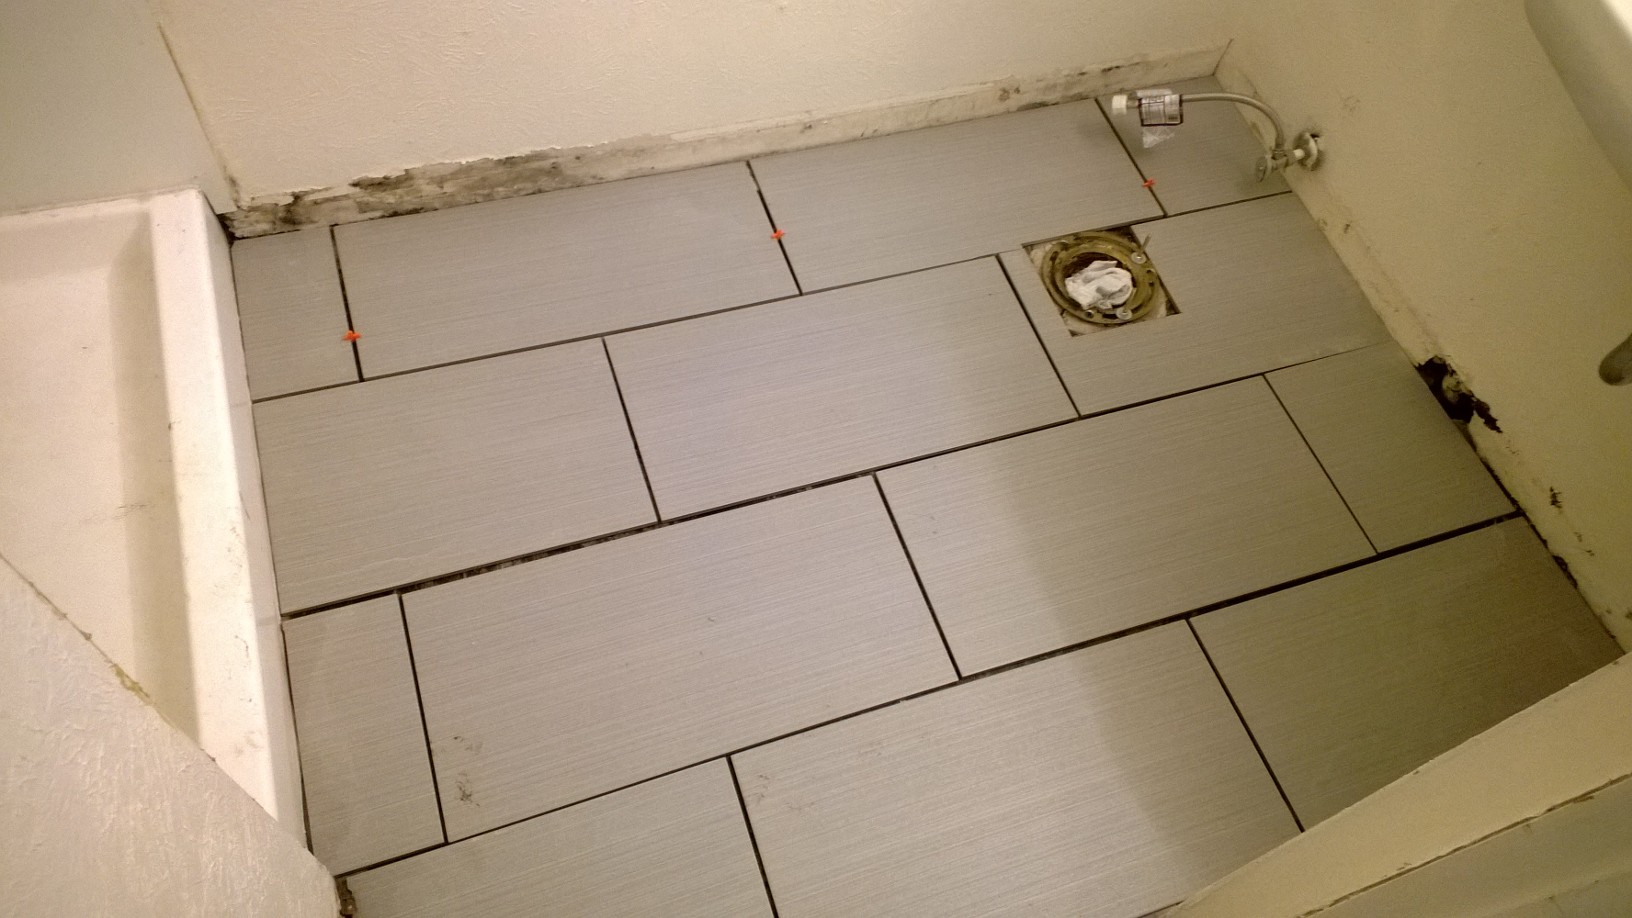
Step 5. With your full room layout complete and all tiles cut you can begin laying your tile. Begin work from the furthest point away from the exit door so that you don’t have to walk on or disturb the tile once you have begun. Start by removing two rows from your layout at a time (Keep tiles in order as you remove your two rows so you can quickly and easily grab each tile as you go). With a notched trowel scoop up a large amount of tile adhesive and begin to spread it across the floor evenly using multiple strokes to drag and pull the adhesive. Only apply enough adhesive to lay 1-2 tiles at a time to prevent the adhesive from beginning to dry before laying (I did about one tile at a time because the tiles I used were large). Take your time and make sure your tiles fit back into the layout you created as you go.

WP_20130822_010 WP_20130822_011 WP_20130822_009

Step 6. Place tile spacers between your tiles as you lay them to ensure you maintain the same width/gap between each tile. This will be important for grouting and the over all look later.

WP_20130822_006

Step 7. Once you have worked your way out of the room and placed your last tile…step back and admire your handiwork. Now walk away and let your new tile cure for a few days before moving on to grouting and sealing.

WP_20130822_007

5 Comments

Filed under Budget, DIY, Education, Home and Lawn

How to: Remove Laminate Flooring

How To: Remove Laminate Flooring

1. Identify the room you wish to change the flooring in.

WP_20130806_003

Step 2. Remove baseboards, decorative molding, etc from around the perimeter of the room (occasionally this may not be over the top of the laminate but you will want to pull it up anyway so you can place your new floor properly.)

WP_20130806_004

Step 3. Use a box cutter or multi-use tool to cut the silicone seal around the base of any fixture you are not removing before or at the same time as the flooring (these fixtures should however be removed prior to laying the new flooring. (It is never wise to lay new flooring around an existing fixture such as a toilet or sink. In the event of an accident or leak down the road having access to the base of these fixtures is very important.)

 WP_20130806_006 WP_20130806_007

Step 4. Using your same multi-use tool (I’m using my SHUR LINE 10 in 1 tool available at the local hardware store http://www.lowes.com/pd_178391-1077-07217_0__?productId=3018291 ) or utility knife start in the corner of the room furthest from the door. Cut a line straight out from the corner, use the edge of your multi-tool to get underneath the laminate flooring and lift along the cut area. Then grab with your gloved hand (It will be very sticky under the laminate) and pull.

WP_20130806_008 WP_20130806_009 WP_20130806_010 WP_20130806_005

Step 5. Remove all laminate from the floor working toward the door so you don’t have to step on the adhesive under the laminate (which will stick to the bottom of your shoes and then come off somewhere else in your house you don’t want to find it). The laminate may come up in one piece if you are lucky…or if (like this room) the previous owners used black tar to adhere  the laminate to the subflooring you may be in for a bit more work. The laminate in this room was very difficult to peal up and I had to take it out in strips. Eventually I worked out a system where I would muscle up a piece large enough to hold on to and then I would squat and lean back so my backside could do the heavily lifting for me (What can I say it was one of those times I felt thankful for all that junk in my trunk lol). It was a lot more work than I expected but in the end I had a room free of laminate and ready for cleaning to start the tiling process!

WP_20130806_011

Step 6. Admire your laminate free floor before heading to the store to pick up adhesive remover.

WP_20130806_013 WP_20130806_014

Side note…here is the other bathroom I have removed the laminate flooring in. In this room the previous owners used self sticking individual laminate squares. The adhesive on these is much less durable than the black tar adhesive used for large sheets of laminate…as a result these squares came up very easy. Simply place the tip of your multi-tool under the edge of each square and pop them up! A few stuck better than others, but on whole the process in this bathroom was very easy.

Congratulations you just removed your old laminate flooring!

3 Comments

Filed under Budget, DIY, Education, Home and Lawn