Tag Archives: Cooking

Fruit Sushi

Created with Nokia Smart Cam

I have always loved the look of sushi. It looks wonderful as it comes to the table (you just know a lot of work and love went into making it). Unfortunately I happen to be allergic to fish…like all fish! So sadly I have never been able to have sushi. For many years I wanted to make sushi for a party even though I couldn’t have it, but recently was struck by lightening as I thought (why not just make sushi you can actually eat?! Sushi with fish isn’t the only sushi out there!) I had a few ideas in mind but decided to google fruit sushi to see what other people may have tried (what worked and what failed) and I found an overwhelming number of great recipes from home chefs all over the world. Here are two websites that I used and/or took inspiration from.

Fruit Sushi — Sushi de fruits

http://www.sheknows.com/food-and-recipes/articles/1035627/fruit-sushi-recipe

I started with these ideas and recipes and then made my own variations. It all turned out wonderful and was a great hit at the dinner party I took it to…but I think in the future I will also make some dipping sauces to go along side of these pretty little treats. After all regular sushi has soy sauce…why shouldn’t fruit sushi have a raspberry and balsamic glaze for dipping!?

In addition to the recipes from these two sites I also made up my own sushi roll and the recipe is as follows…

  • 4 pieces of prosciutto slightly overlapping on a piece of parchment paper.
  • Then add a thin layer of the rice pudding/sticky rice.
  • Layer sliced figs (or dates) and goat cheese in the center

When you roll up the sushi really press the whole thing together pretty tight so the rice doesn’t fall out when cutting. Then once you have your neat slices, turn them on the side to show your lovely design and enjoy.

Leave a comment

Filed under DIY, Food and Drink, Party Planning, Recipes

Girls vs Dinner Eggplant Parmesan & Fruit Salad

WP_20130901_072

The last week of August and first week of September were busy times for the two of us here at Girls vs Blog. In addition to our regular daily activities and stresses we were also preparing for Katie’s baptism. Of course such a momentous occasion could only mean one thing…Road Trip! Well..for one 🙂

After having finished Katie’s dress (mostly… I may have done a few things the night before the baptism) I packed up my little car and began the trip out to Utah. The great thing about these occasions and trips is time with friends and family and of course both Girls vs Bloggers in one room…working on projects and cooking food and having fun together!  This trip was no different, and while many times we find ourselves so excited about getting to visit we forget to take pictures of our adventures…this time we managed to capture dinner.

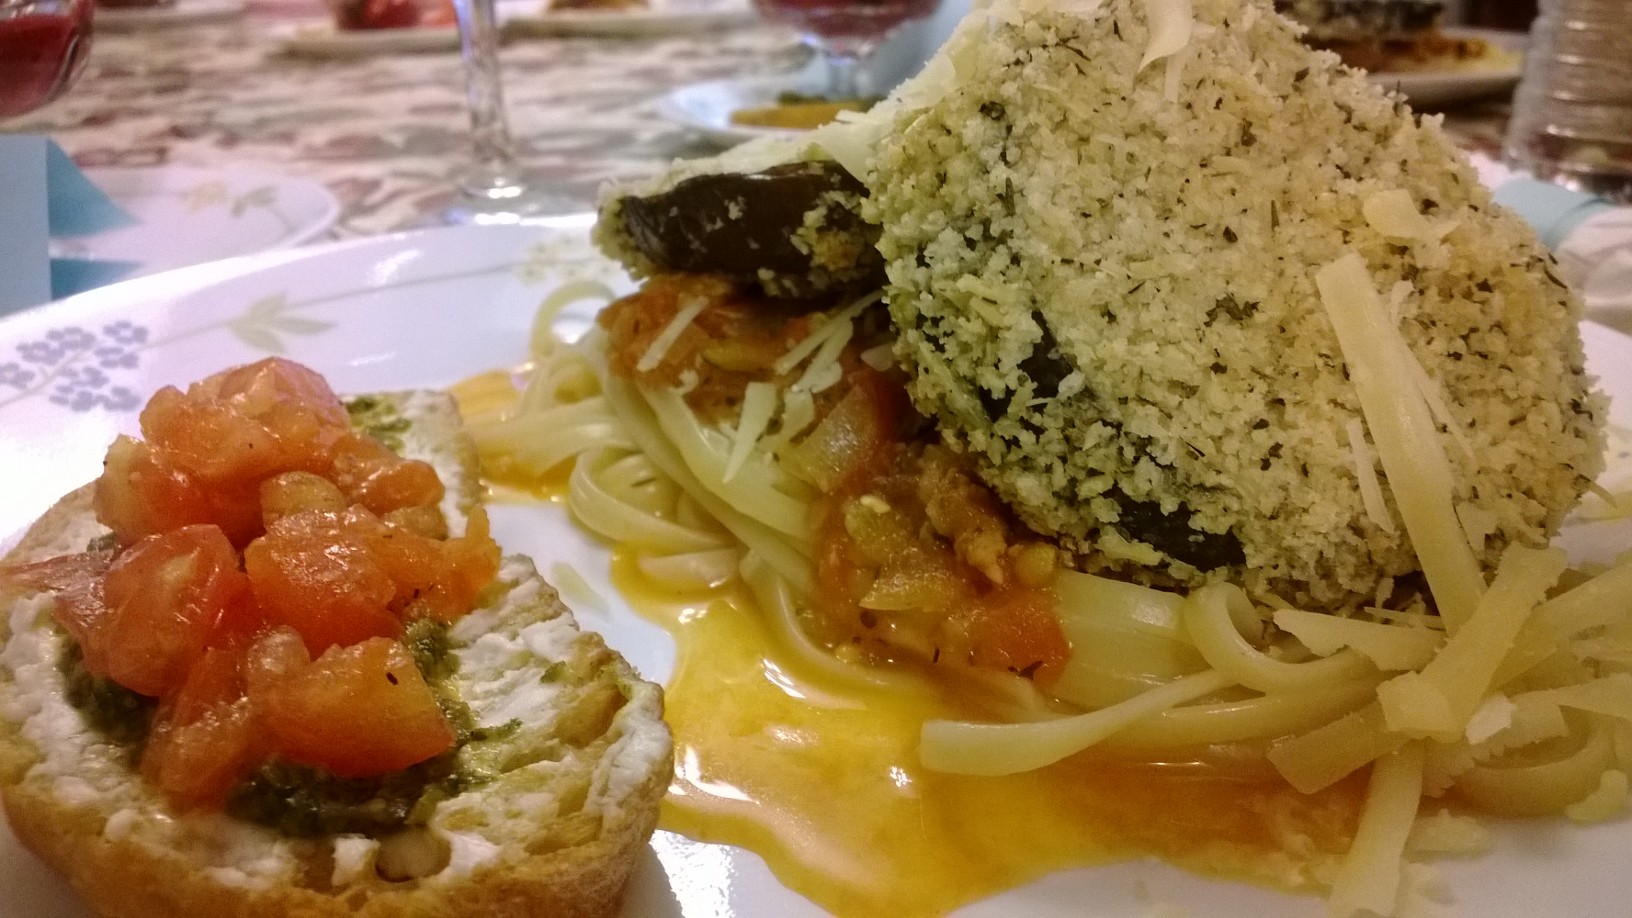
With two spunky girls in the kitchen (and a handful of little ones running around helping) how could dinner be anything but fantastic…not to brag or anything. So here it is…Eggplant Parmesan and a delicious fruit salad topped with a lime, honey, mint dressing. Enjoy!

We began by making a trip through the pantry to see what we had on hand and then made a trip to the store to see what was fresh. As luck would have it Eggplants were piled high, looking delicious and ON SALE! We picked up two to feed 9 people and had left overs to take next door to the neighbor. Next we strolled through the fruit section and found fresh berries were on sale…so into the basket they went as well. With a game plan in place we assessed what we had seen in the pantry at home and then picked up a few remaining ingredients like panko bread crumbs and one or two extra tomatoes (as we weren’t sure there were enough from the garden).

Step 1: Gather all ingredients so you don’t have to run around the kitchen looking for stuff halfway through

WP_20130901_045

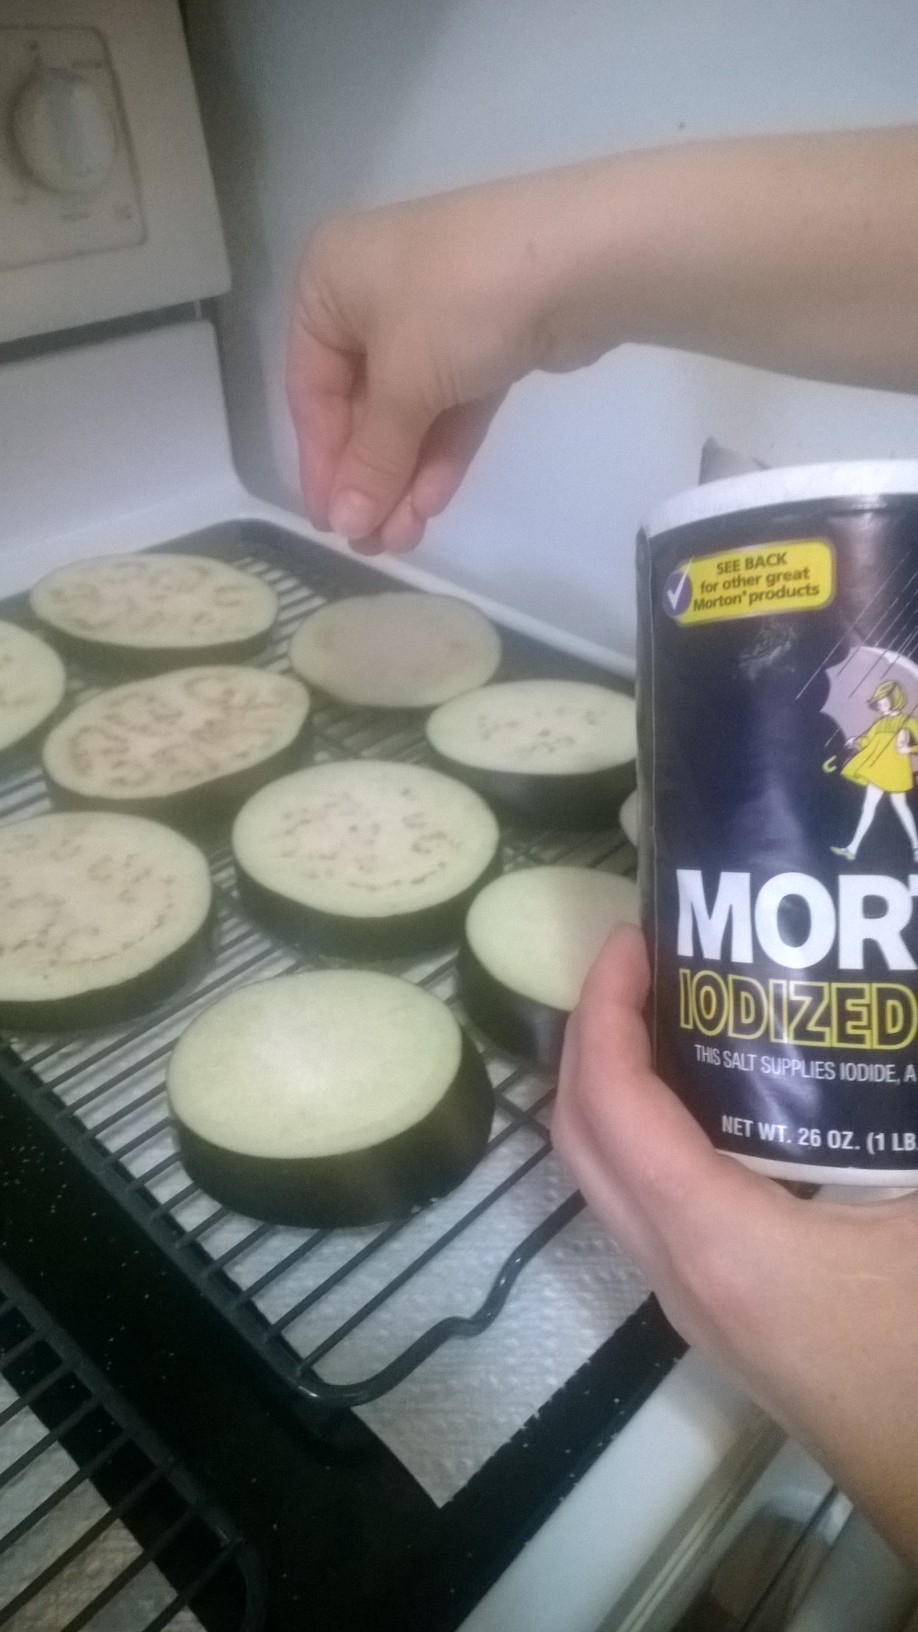
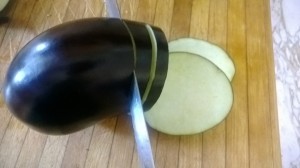
Step 2: Slice eggplant into 1/4-1/8in thick sections and place on a wire rack. Salt the slices liberally then set aside with paper towels or kitchen towels under the racks. This allows the additional moisture to come out of the eggplant which keeps the outer crust crispier later and makes for more even cooking.

WP_20130901_049 WP_20130901_050

Step 2: Prep for tomato sauce. Gather your fresh picked or purchased tomatoes and place them on a baking sheet. Coat tomatoes in olive oil, salt and pepper and place in a 350 degree oven for 10-20 minutes or until the skins begin to roll and peel away from the flesh. If skins can be easily removed they are done…if they are still difficult to remove and are taking flesh with them when you peel back place the tomatoes back in the oven for a few more minutes.

WP_20130901_051 WP_20130901_052

Remove tomatoes from oven and set aside to cool slightly before peeling. While tomatoes are cooling grate a zucchini (we are about to hide some super nutritious veggies in this delicious sauce. The kids won’t even know they are there!) As luck would have it our girls actually like the veggies so I don’t really have to hide them…but I still like to grate the zucchini because it disperses the flavor well and thickens the sauce! Then peel the tomatoes and set aside.

WP_20130901_053 WP_20130901_056

Step 3: Remove casing from your italian sausage of choice (we used spicy italian chicken sausage) and place it in a hot pot. Immediately begin to break up the sausage with a wooden utensil. Once the sausage has begun to render its fat add one whole diced onion and saute until the onion is translucent and the meat has finished cooking. Then add 2-3 cloves crushed garlic, grated zucchini, and any other veggies you are slipping in (I also grated the thick ends of the eggplant and added them in). Sauté until veggies are soft and garlic is fragrant.

WP_20130901_054 WP_20130901_055

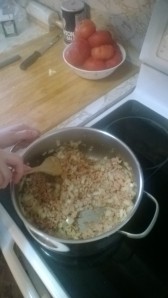
Step 4: Dice, crush or otherwise destroy your lovely roasted tomatoes and add them to the pot along with a few hardy palms full of your favorite italian seasoning combination (we make up our own each time adding spices such as basil, parsley, oregano, pepper, cumin,  paprika, thyme, crushed red pepper, etc). Then reduce heat and let sauce simmer while you complete the rest of dinner (add a palm full of sugar to the sauce at the end…right before serving to brighten the tomatoes and round out the sauce. Don’t add it earlier or the sugars can scorch!)

Step 5: Prepare fruit salad! We added grapes, raspberries, blue berries, strawberries and banana’s. Rinse all fruit and slice the grapes in half and the strawberries into quarters. Add all fruit to a bowl and toss with dressing. Dressing = 2-3 fresh limes squeezed, equal parts honey and a splash of oil whisk together. Then add freshly chopped mint leaves and whisk again before poring over salad. Toss all fruit and dressing to combine and then set aside to allow the flavors to marry while you finish dinner.

WP_20130901_058 WP_20130901_060

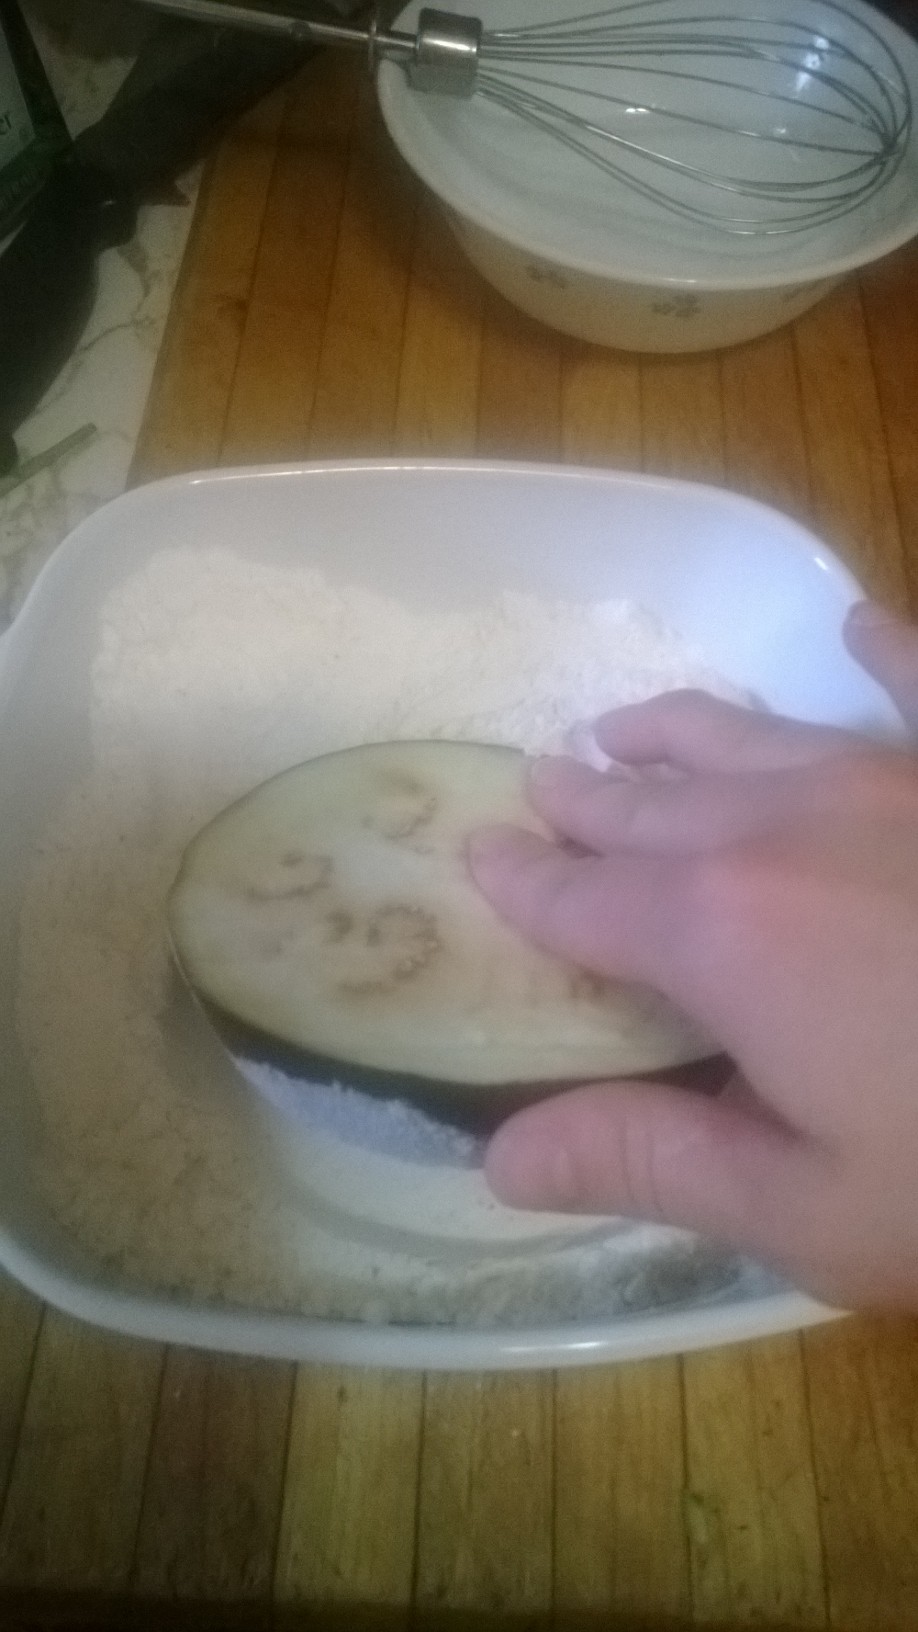
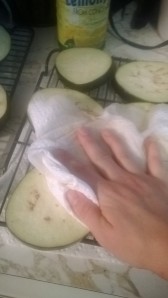
Step 6: Your Eggplant should have a nice layer of moisture sitting on the top at this point showing you that it is ready to get started. Pat all dry (pushing down a little as you do to squeeze out remaining liquid). Then follow the three-step process for coating – dredge, wash, coat. Dredge in seasoned flour (seasoned with S&P)

WP_20130901_061 WP_20130901_062

Dip in egg wash.

WP_20130901_063 WP_20130901_064

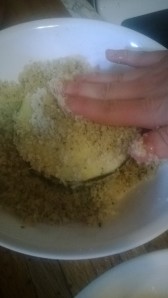
Coat in bread crumb mixture. Bread crumb mixture is 2/3 panko to 1/3 traditional bread crumbs. Add the same spices you added to the sauce to the crumbs so your eggplants are well seasoned and tasty; as well as a handful of parmesan cheese. Finally add enough olive oil to make the mixture the consistency of beach sand. The reason we add the olive oil here is so we get a nice crispy crust without frying! You may need to pack on the crust with your fingers. Once you have a nice even coating place onto a cooking sheet lined with parchment paper.

WP_20130901_065 WP_20130901_066

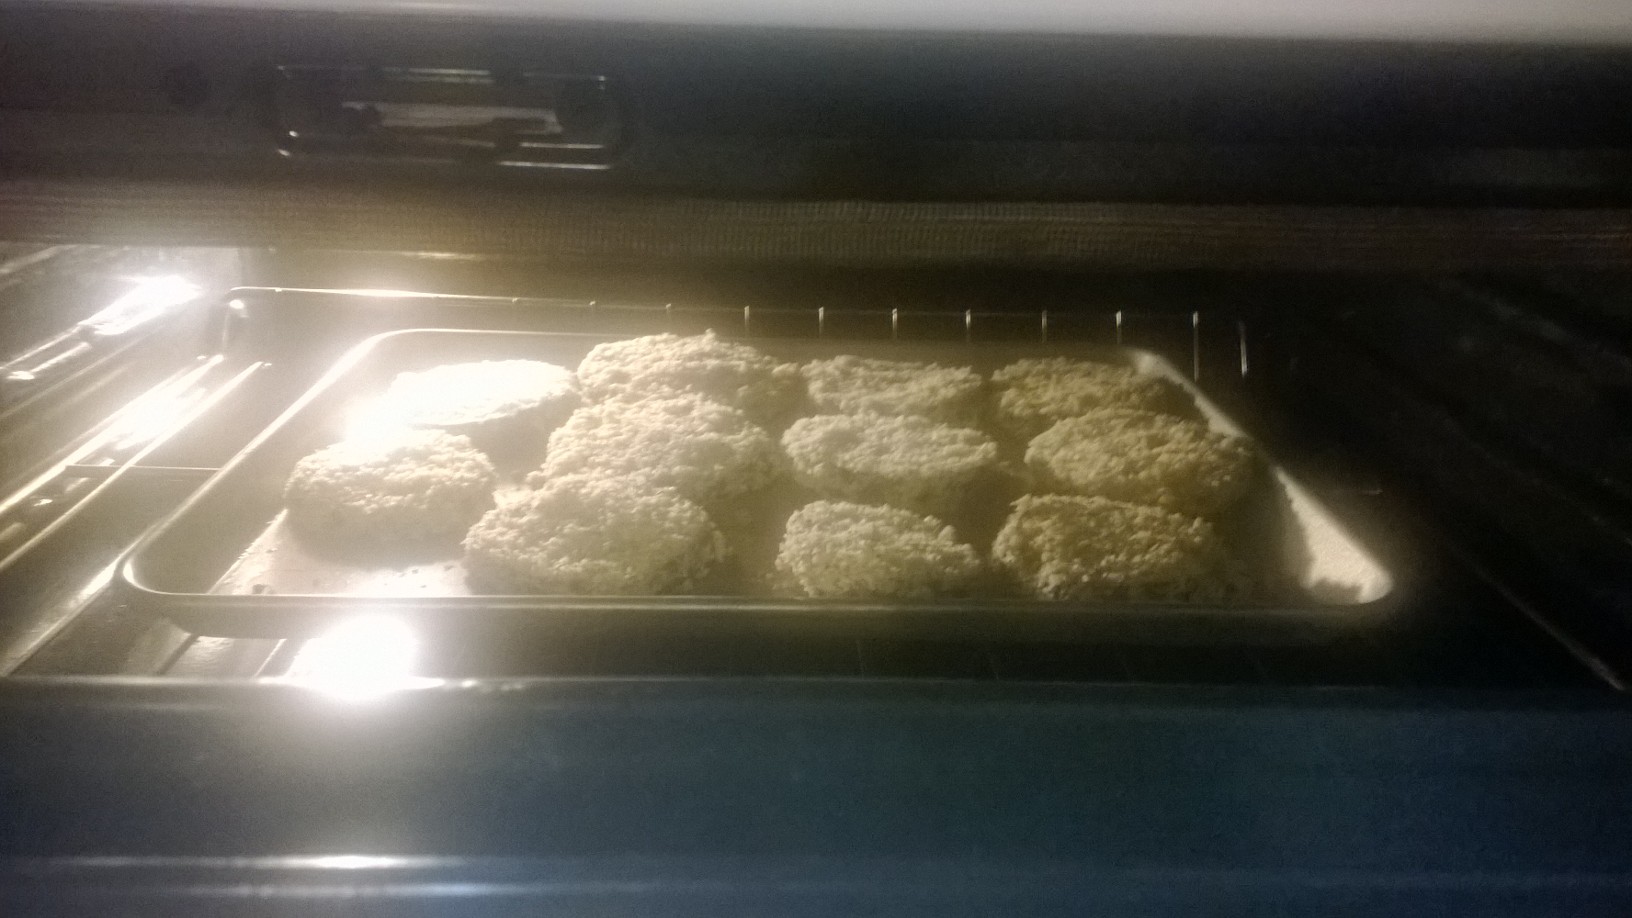
Bake in a 350 degree oven for 25-35 minutes or until the outside is crispy golden brown and the inside is cooked through. Turn once halfway through cooking to allow both sides to brown evenly. While these are cooking – make your pasta and any h’orderves/breads you wish to serve.

WP_20130901_069

While making dinner we gave the little girls projects so they could help with dinner too! They cleaned and set the table. Picked out which dish they wanted to use (they wanted to pull out the fancy glasses and parfait cups for this occasion), and then we had them create name cards for each person at the table. The eldest two girls wrote the names on the cards and all 4 girls helped to color and decorate them.

WP_20130901_071

Once the eggplant is done, the pasta is ready and the table is set it’s time to plate. We served the fruit salad in parfait glasses as a kind of desert salad. On a main plate add pasta, tomatoe sauce and top with a few slices of eggplant. Then top everything with freshly grated parmesan cheese and enjoy!

WP_20130901_072

Bon Appetit!

Leave a comment

Filed under Budget, Children, DIY, Education, Family, Food and Drink, Recipes

How To: The Beauty of Brining

What is brining? Brining is the process of soaking a meat (any meat) in a salt and water or salt, sugar and water solution (you can also add spices). Brining usually takes 6-12 hours depending on the type of meat and the size or portion you are working with.

Why do we brine? 

Brining meat, for example a lovely thanksgiving turkey, helps to bring extra moisture and flavor into the meat via osmosis. What does that mean? Once the meat is placed into the brine the moisture from within the cells of the meat travels out into the brine solution -because the sodium content in the solution is higher than that of the meat. Once the solution has diluted the brine and an equilibrium is formed again the moisture begins to travel back into the meat (along with salt, sugar and other spices within the brine). The cell then expands to accommodate the extra moisture. During this process the outer protein structure of the cell is broken down by the high acid (sodium) content of the liquid. This structural breakdown creates a net around the cell which traps in the flavored moisture during brining as well as prevents the flavors and moisture from leaving the meat during cooking. 

In the end…brining creates a more flavorful and juicer dinner!

How do we brine? Lets start with a turkey for say… Thanksgiving dinner.

You will need your cleaned turkey (all giblets etc out of the cavity) and a cooler, bucket or brining bag. I have a brining bag.

Next we need the brining solution (recipe below). I have the brining solution completely cooled in the pot I made it in and the giblets set aside in another pot for making stock (waist not…want not).

 Pour the brine into the bag or cooler and combine with enough ice water to cover your turkey. If you aren’t sure how much ice water you need, error on the side of not enough. Once the turkey is in the bag add any additional liquid needed to cover (agitate slightly to mix in the extra water). Start with the breast meat down to infuse the maximum amount of moisture into the driest meat.

 Finally place the cover on the cooler or seal the bag and place the turkey in a cool spot in your kitchen, your garage (or if the weather is cool enough on your porch – but be mindful of poachers if you take this approach). Let the meat sit in the brine for 6-12 hours depending on the size of the meat (I let this 14lb bird brine for 8 hours to maximize tenderness, moisture and flavor). Turn the meat once half way through brining if laid flat in a cooler.

You may be concerned about not having the bird in a fridge BUT FEAR NOT! You have your bird in a salty liquid which acts as a deterrent for bacterial growth. 

Once the brining process is finished remove the meat from the brine and pat dry to prepare for cooking as usual. You do not need to rinse the bird as the spices that will remain on the outer skin will simply continue to flavor the skin and meat while cooking.


Brine recipe:

2-4 cups stock (vegetable, chicken, turkey etc)

1 cup salt

1/2 cup brown sugar

preferred seasonings (mix and play here to create a flavor palate you like)

—If you are unsure of your preference because you are starting out…try this combo for poultry:

palm full of thyme

1/2 palm full of cumin

1/4 palm full of paprika

2 cloves roughly chopped garlic

1/4 palm full freshly ground black pepper or full palm full of whole pepper corns (which ever you have)


Try this season combo for pork:

palm full rosemary 

1/2 palm full cumin

1/2 palm full of lemon pepper

1/4 palm full of mustard seed

2 cloves roughly chopped garlic

Combine liquid, salt, sugar and spices in a pot and bring to a light boil. Cook until all of the salt and sugar have completely dissolved. Then remove from heat and allow to cool completely. (You can make your brine in advance and store in the refrigorator until you need it).

http://www.foodnetwork.com/recipes/alton-brown/good-eats-roast-turkey-recipe/index.html

http://www.americastestkitchen.com/science/detail.php?docid=1755

1 Comment

Filed under DIY, Food and Drink, Recipes

Pho!

Pho!

I found this recipe in Laurie David’s The Family Dinner under the title Vietnamese Soup in a Teapot. yeah… it’s Pho. The good stuff too.

This site has copied the recipe exactly. YUM!
http://www.edamam.com/recipe/vietnamese-soup-in-a-teapot-21a7a4df0bb529bf77c10f6db0cbe872

Leave a comment

by | July 17, 2013 · 4:06 am